Week 12
- aoh2570
- Jun 11, 2023
- 2 min read
Updated: Jul 18, 2023
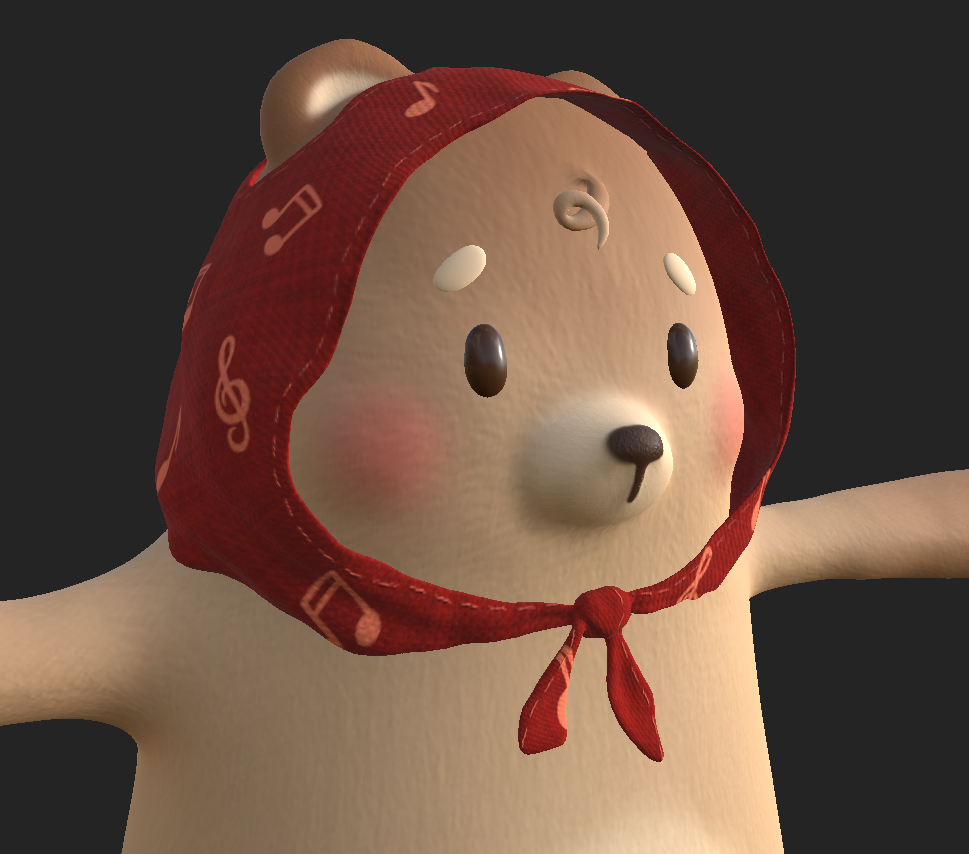
Bear Textures
This week I managed to texture our bear in substance painter. My process for doing so was first laying down the base colours and then on another layer, I increased the height setting on my brush to add depth and create the illusion of fur. I also did a similar process with the head scarf by creating a fill layer (with the fabric texture as the material) and increased the height to create depth and painted on some little stitches. It was important for me to pay attention to these small details because it helps our model pop more and enhances the realism while still staying stylised. I could have used x-gen to create the fur but it would have looked too realistic for what we wanted and ran the risk of looking uncanny. Therefore I tried to make the head scarf highly realistic and the body more stylised to achieve a sense of balance.


VFX Shot Final Composite
For the VFX shot I aimed to get finished this semester (sunset scene), Unfortunately I was unable to composite the bear into the shot since we finished it much later than intended. However I still wanted to test if your VFX pipeline would be effective so I continued to edit the scene in After Effects. Emily and I set up a default 'montage template' that has our film border overlay and other effects like grain, chromatic aberration, lens blur etc. This ensures that every shot in our montage has similar editing and the template makes our work flow much more efficient.
In conclusion, our VFX pipeline has proven to be successful in working smoothly and efficiently. Therefore when we start compositing more shots next semester, we will have a good workflow set up and will know what to expect.
Final edit + breakdown:
Tracking
There are a total of 9 shots that I have started tracking in Nuke. Most of it was fairly easy but the part I struggled with was trying to get the 3d camera to match the perspective of my scene. However as I continue to track my scenes, I'm sure I will improve on this and become fairly comfortable with the task.

2D Animation
The very last scene of our short film there is a black card that says "dedicated to a dear friend" as a memento to Edyn. Initially I planned for it to literally be just that - a plain black screen with white text. But to make it feel more personal I thought it would be nice if I wrote the text by hand and added a subtle 'jitter' animation to it. Since this film is based on my friend, the act of me hand writing "dedicated to a dear friend" really adds a nice touch and further reinforces the personal context to the film. I used procreate to animate the text and got the 'jitter' effect but rewriting the text a few times which had some variation.

Then I composited this animation in After effects because I wanted to add some film overlays into it. This is because I want to create a link back to the montage section where the girls where reliving the memory of their friend and it also acts as a good segway into our credits which will also have a film aesthetic.


Comments